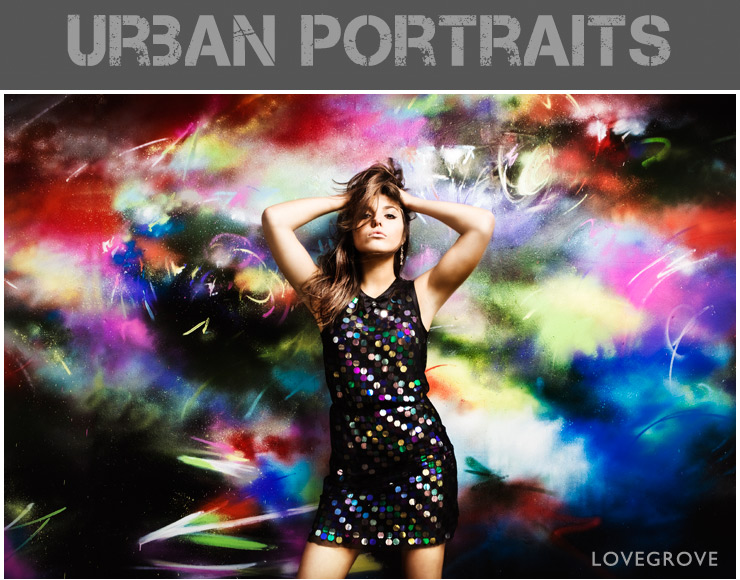
 This is my biggest ever guide to shooting portraits in the city right here. 2700 words of ideas, strategies and techniques to empower you to make the world your studio. The concept of shooting portraits on city streets is nothing new, It’s been around as long as photography itself. And unlike street photographers who candidly document the people of a city without intervention, Urban Portrait shooters take control of everything and make studio grade portraits everywhere.
Here’s how I select the location, style the shoot, control the lighting and create the moment…
The perfect location
What makes the perfect location? A great city location is an area full of picture opportunities closely packed together. I like to work within a 500m radius of my start point and aim for enough variety of backgrounds and shoot spots to last me a whole shooting day. I usually start at a coffee shop so I can meet my client in comfort before we venture out to start shooting. I shoot come rain or shine as there is nothing more frustrating than having to cancel a shoot for bad weather. I shoot in the months from March to September here in the UK because cold weather can make the process painful. As I occasionally have to shoot in the rain I need the option of covered areas to work in. These can be pedestrian underpasses, areas beneath flyovers, railway bridges, canal tunnels or building canopies over entrance porches etc. A perfect city location also has cafés with toilet facilities, a place for lunch and the opportunity to shoot without being moved on by police or security staff.
02. Stina against a hoarding surrounding a building site. I used a barefaced Speedlight from behind Stina and a Speedlight with full CTO gel from the front in a simple two point lighting strategy. I then set a white balance of 3400k to pull the white balance back.
Finding Locations
I invariably start with Google Earth looking for intersections of rail, tramways, roads, rivers and canals. These provide multi level zones with bridges and tunnels. These are ideal for controlling the light and staying dry on the shoot. I then use the Google Maps overlay to find parking locations, somewhere to meet and a place for lunch . Google Street View is the next tool I use to look for photography backgrounds. A good background can be a stainless steel louvre at the back of a commercial building or a wall of glass at the foot of an office block with interesting reflections. Being able to wander around at street level from the comfort of my studio is a real bonus at the planning stage. I can add virtual pins and create a walking route. I follow the links on Google Maps to business websites to see the opening times of cafe’s or check on parking prices etc.
Finally I use the free tourist information websites with ‘what’s on’ calendars etc. I don’t want to get to a location and find it’s fenced off for The tour of Britain cycle race or a half marathon etc.

03. I used a full CTB gel on the backlight Speedlight and a full CTO gel on a Speedlight in a Lastolite Eazybox as a key light. The location is under the platforms at Bristol Temple Meads Station.
The recce
This is a process I adopted from my days at the BBC when we used to go and look around a location to fine tune a schedule and plan the technical requirements of a shoot. This has to happen after the online work has been done because cities are vast and a certain amount of narrowing down is vital. At the recce I’m looking to confirm the suitability of a location with regards to safety and security. I love disused at railway lines and dock sides, in fact all kinds of places that present hazards. I can then do an assessment, schedule the times we will be at each location and what kit I’m likely to need. I need to confirm several things like the suitability of covered spaces for lighting control, backgrounds and textures. I use my phone camera to record shot opportunities and pin the locations on my Google map. If it’s raining or overcast when I recce I plan for the position of the sun using the Photo Pills app on my iPhone.
In Manhattan, New York I had narrowed down the shoot zone to the Meat Packing district using Google Earth and Street View. My recce the day before the shoot confirmed the final route, the shoot backgrounds I used plus the Café I met my client in.
On a recent recce for a shoot in the City of London I confirmed the small back streets between St Paul’s Cathedral and the river Thames to the West of the main thoroughfare are abandoned on a Sunday. All the office and banking staff are off duty. I also loved the shiny aluminium beer barrels stacked up on the pavements from the antics in the pubs the night before. I ascertained that these get collected first thing each Monday morning. On the shoot itself we worked all day without being asked to move on by police or security staff. I rigged Speedlights on stands, and had all sorts of set ups without any trouble at all.

04. This shot of Victoria Bond on the streets of Bristol is from my latest training video ‘Illumination 2 ~ Urban Portraits’ and it simply uses a Cactus RF 60 Speedlight in a Lastolite Eazybox and grid as the keylight.
The styling
For urban grunge I use harder light from bare faced Speedlights and I choose reflective fabrics like leather jackets or wet look leggings to make the pictures come alive. I find that black cotton is a no no because it soaks up light and ends up as black holes in the final images. For contemporary locations like glass fronted office buildings and other clean surfaces I like to introduce pattered printed fabrics.

05. Lisa Marie on the steep steps in Sienna that lead up to the Piazza Del Campo. A single Speedlight with a full CTO gel is the keylight. The blue is provided by the fading daylight.
The light
Well done for getting this far. As you may know I cover lighting and shooting techniques for Urban Portraits really extensively on this full HD video. I like to shoot in locations that give me control of the natural light by blocking it from one or more directions. Once I have control of the ambient light I can go with what there is or I add my own with one or two Speedlights. In the rare places where I have no control of the ambient I tend to over power the ambient as required with flash using the ambient as a bit of fill. Go to far and it looks like the picture was taken at night.

06. This shot of Rosalinde is lit with a single Cactus RF60 Speedlight with a half CTO. I processed the image to have an Edward Hopper colour palette. The background illumination is from the sun.
Camera and lighting kit
Camera: I use my Fuji X-T1 camera with it’s tilting screen. This attribute is vital if I want to avoid lying in the gutter to compose my image. It’s great for high angle viewpoints too. With the X-T1 I can easily shoot from above my head and my urban photography is far more varied and creative now than when I was shooting them old SLRs a few years back.
Lenses: I shoot primes. I make far better shots when I’m composing with primes. I’m more active at the set up stage moving around until I have the perfect balance in my shot. I’ve always preferred prime lenses from the time I first started photography back in the 1970s. I used zooms for the 10 years when shooting weddings but I’m back on primes and loving the compact lightweight nature of the lenses. At the moment I’m using 14mm, 23mm, 35mm and 56 or 60mm lenses and these fit in my Think Tank Retrospective 7 bag with ease together with a pair of Speedlights. My eventual Urban portraits lens line up will be 16mm, 23mm, 35mm, 60mm and 90mm when Fuji release the 16mm and 90mm lenses in 2015. I will be move up to a Think Tank Retrospective 30 bag for that kit. It will be the perfect size for one body 5 primes and a pair of Speedlights. I don’t need to cary more kit than that because I’ve had enough back breaking years in the SLR days. If I only had one lens it would be the excellent 23mm prime. My stands with their flash brackets attached are carried in one hand and the rest of the kit is in my Think Tank bag. The whole kit is lightweight and easy to carry around for a whole day on the city streets.
Cactus RF60 Speedlight x 2 These Speedlights have the power of the best units from the leading manufacturers with a built in radio receiver system and a zoom flash head. I use them in full manual mode for ultimate control and consistency.
Cactus V6 transceiver x 1 This universal unit can act as a transmitter from any camera with a standard hot shoe and gives full manual power control of most Speedlights from the major Camera makers attached to another V6 acting as a receiver.
Lastolite Jupiter stand x 2 These great value stands are under £40 and have a wide radius spread when fully opened giving a stable support for a Speedlight even in moderate winds. The Jupiter stand goes really high too making it perfect to simulate street lighting effects.
Lastolite Ezybox and grid for Speedlights. Often called the Ezybox Hotshoe. I prefer the 55cm version and I keep the grid in place all the time.
Lovegrove Flash bracket x 2 A small unit that can be mounted on a light stand that allows a Speedlight to be rigged in any direction using the ball and socket head and universal insulated cold shoe.
Full CTO & CTB colour correction gels x 1 of each. I cut my own out of big sheets of lighting gel available from theatre suppliers for under £5. CTB is colour temperature blue and is designed to and CTO (Orange) is designed to reverse the process.
ND filters in stacking caps. I use three sizes of ND filter for my lenses and I keep them in aluminium stacking caps I bought on Ebay. I have found the HoyaPro series the most neutral and I have ND8, ND16, ND64 and ND100 in all sizes
Hoodman Loupe. If you review your pictures using an LCD screen on the back of the camera this bit of kit is a must. With the loupe resting on your LCD you can clearly asses your exposure and flash balance even in full sunlight.

07. This is another frame of Victoria from my recent video release called ‘Illumination 2 ~ Urban Portraits’ and the keylight is a Cactus RF60 in a Lastolite Ezybox with grid. The blue light is from the fading daylight.
How to achieve the effect
Backgrounds
Be very selective with your backgrounds. They don’t have to be big. I often use just a 2m wide piece of wall or glass as a background for my urban portraits. Shooting wide open with a standard or telephoto lens away from a background can soften the look and render it beautifully out of focus.
Depth of field
Use neutral density filters to achieve a wide aperture, shallow depth of field look When you use Speedlights on location with mirrorless cameras. The electronic viewfinder and LCD remain bright as the exposure compensates automatically. A HoyaPro ND100 filter gets you from f/16 to f/1.8.
Colour
Mix your colour temperatures. Use a CTO gel on the Speedlight and set the camera white balance to 3400k to make the background or daylight lit areas go blue while your subject maintains a warm glow. Use a CTB gel as a backlight for added effect.
Modes and settings
Use manual exposure control for your camera and manual power settings for your Speedlights. This will provide a consistent exposure even when you change your composition. Using triggers like the Cactus will allow you to set the flash power remotely from the camera position.
Exposure
Without the flash switched on set you camera shutter to the maximum flash sync speed, the ISO to it’s lowest setting and then adjust the exposure of the background using the aperture. Then add flash to taste adjusting the flash power and position as required.
Review each shot
It’s all too easy to get carried away when shooting with Speedlights and run out of battery power. Stop and look at the image after each flash shot taken. Use a loupe or EVF to see how it can be improved. Make tweaks as required until you have perfection then move on.
08. Victoria is set against the coloured glass of the Hargreves Lansdown building in Bristol and lit with a single barefaced Cactus RF60 Speedlight.
Top tips
Get it right in camera. Even if you are shooting RAW set the white balance and picture style to give the finished look you desire.
Adjust the ambient exposure to set the black level in the shadows. The only way to accurately review what you are getting is to use a loupe for the LCD or use the electronic viewfinder if you are mirrorless.
If you are shooting in sunlight place the sun behind the model and use it as a back light. Then add flash as required from the front but not in a fill flash way, be bold and use it as a key light.
If you change camera systems keep your old Speedlights. With the V6 trigger units from Cactus you can take full control of your old Speedlight on your new camera. It even has an LCD read out of the power setting.
Have public liability insurance. When you shoot out in the city you and your lighting stands become a hazard. Take care, accidents do happen but with so many ‘personal injury’ claims floating around you might just find yourself a target for fraud.
09. I used a Speedlight from above the camera to create a bit of magic lighting for Victoria. The green glass background made a perfect backdrop.
Glossary
Key light: The main or principal light. This can be the sun, a Speedlight or a window. It is the dominant light that is landing on your subject.
Back light: This is a light that is opposite the camera position. If your subject is facing away from camera it would in fact be lighting their front.
CTO: Colour Temperature Orange refers to the colour of a filter. CTO filters are orange in colour and come in various grades from full to 1/8th strength. Full CTO converts a Speedlight at a daylight colour temperature of 5,600k to 3200k, approximately the colour of tungsten light.
CTB: Colour Temperature Blue filters also come in various grades and full CTB converts tungsten light at 3,200k to daylight at 5,600k or can be used on a Speedlight at a daylight colour temperature of 5,600k to convert it to over 10,000k

10. Natural light can be used to good effect too. Victoria Bond looks sublime in this frame from the ‘Illumination 2’ movie. I’ve shifted the white balance to cool the image right down.
Whatever you choose to shoot and however it all comes together don’t be scared to get out there and practice. I practice every week and I shoot thousands of frames before each technique is completely under my control. Stay inspired and please feedback on this article below. Keeping comments, questions and answers together here helps add to this resource. I endeavour to reply to all questions posted on this blog :)
Having done your day’s workshop in Bristol on shooting urban portraits this article reinforces the techniques you showed us. Really helpful and great images, as ever. Thanks, Damien.
Thank you for the compliments and kind words.
Regards,
Damien
Excellent Guide! I’ll test out the location tip on my next shoot.
Thanks for the compliments. Give the system a go. :)
Quality article, one I’ll probably revert back to on numerous occasions. Definitely going to have a play with manual WB & CTO!
Hi Matt, Thanks for the compliments. Give the CTO a go :) Cheers, Damien.
Hi Damien, Thank you very much for sharing your knowledge. Your pictures are a very inspiration for me. I’d like to buy your last DVD Urban Portrait, but is it possible to download it instead to have a physical DVD ?
Thanks in advance and I wish you a great 2015 with many teaching for us. Claudio
Hi Claudio,
Thank you for the compliments. The video is available as a download from here: http://www.lovegroveconsulting.com/videos/illumination_2.aspx Use this discount code lovebright to get the movie at 1/2 price. Use Pay Pal checkout and it will convert to € automatically :)
Kindest regards,
Damien.
Thanks for this Damien. It’s a great reference tool and consolidates much of what I have learnt from your blog and attending one of your urban portrait courses some five years ago. Good luck for 2015!
Thanks for the compliments David. You have a great 2015 too :)
Ive been on courses with you Damien over the years. I will never get tired of reading your articles in whatever magazines I purchase and your downloads and DVDs are the best in my opinion that is available to us. Your latest Urban Shoot download was fab and so is this article.
Wow thanks Nigel. Thank you for your kind words and continued support. I’m hoping to fit more travel into my life in 2015. I’ll need to start rehearsing the next video production soon too. Maybe we will meet up again soon. Kindest regards, Damien.
A great read – but then having watched the videos I didn’t expect anything else! Can’t wait to get out and try it all out…thanks for sharing :-)
Hi Tracy, Thank you for a) being a valued customer and b) taking the time to give me positive feedback. I decided that describing how to find great locations is a topic best put into words while the process of shooting is best communicated with video. The rest of this post serves as revision notes. There is no exam to pass only fun to be had. Stay inspired, Damien.
What a fantastic, inspirational post. Thanks for your generosity in sharing your process, knowledge and expertise with the community Damien. I bought your ‘Illumination 2’ video series, which I love, and this article is the perfect complement to that.
Thanks Ian, I just noticed that I had missed your kind words first time around. A lot of shooting has happened since then and I value the memories of shooting with you this year. I do hope we can get together soon. Hâvard is coming to stay next weekend and maybe it won’t be long before we can all get together. Stay creative and have fun, Damien. :)
Happy New Year Damien, and the team!
Found this article a great recap although I watched both Illuminations 1+2! I’d advise anyone to use Damien’s 50% Off code now! Top quality filming, ‘simply the best’!
Thanks Mike, You now have all the information needed to master flash shooting. With video replay and reviewing it’s easy to absorb the information and internalise it as knowledge. Put that into practice, gain some more experience and you are a master of creating light. That’s the theory. Have a fab 2015. Cheers, Damien.
Thanks for the compliments Bob. Stay inspired, Damien.
Super article Damien and great images. I love following your work Damien such an inspiration !!!
Thanks Rick, 5 is one of my favourites too. Sienna is a magical place and we have real fun in the sun on the Lovegrove Italian workshops :) Have a wonderful 2015. Kind regards, Damien.
Once again, great direction and overall guidance – thank you, Damien! A super, healthy and prosperous 2015 to you and yours
Hi Gordon, Thank you for your kind words and well wishes. Have a great 2015 too :)
Great Blog post Damien. My favorite is image #5. What a great mix of colors, light & shadows. It really pops! If I were still shooting portraits for my business I would be using only Fujinon primes. They are incredibly sharp with great contrast.
Have a great 2015!
Great article, thank you for unravelling the mystery! I’m sure like many others your wonderful insight and teaching is most appreciated.
Thanks Dave :) Kind regards, Damien
Great article Damien. Very well written, lots of excellent advice and ideas. Thanks for sharing your knowledge :-)
Thanks Dayve, Have a fabulous 2015 and stay inspired. Cheers, Damien.